Showing posts with label workspace. Show all posts

3/17/09

As Promised... Craft Room Pics!

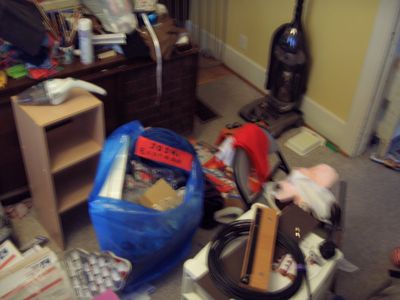
First, This is just Part of the mess we pulled out of the room. Scary, isn't it? I also gave away a full trash bag of fleece and fabrics.
Mess

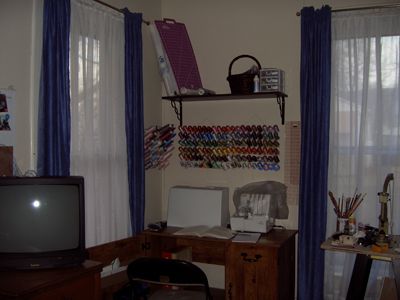
Here is the sewing Corner. Notice the 2 windows? Tons of sunlight for that corner. I am making a basket for the shelf to hold small stabilizers and embroidery/sewing items. In the basket already there is some Merino/Silk I am spinnign right now.
Sewing Area

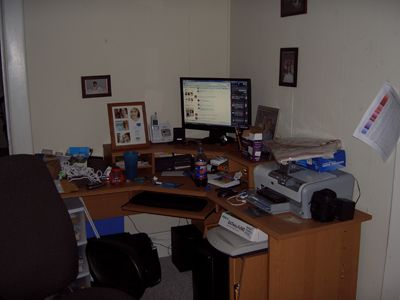
The Computer Area, which isn't as messy as it looks... And yes, that is my facebook up on the computer. And yes I will friend you if you like. :)
Computer Area

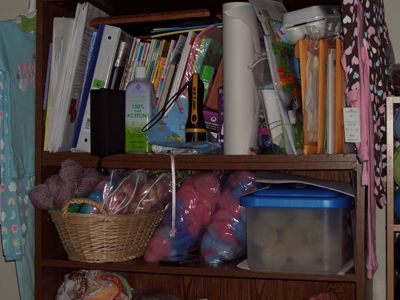
On the bottom shelves of my book case are 6 show-offs, 1 with FOE, 2 with FOs, 1 with Fibers, 1 with bobbins and carders, OK, maybe 2 with fiber. I also have about 10 pounds of undyed fibers in my pantry.
Bottom Shelves

The top shelf has yet to be touched, but holds patterns and books. I need to clear it out of junk though.
Top Shelves

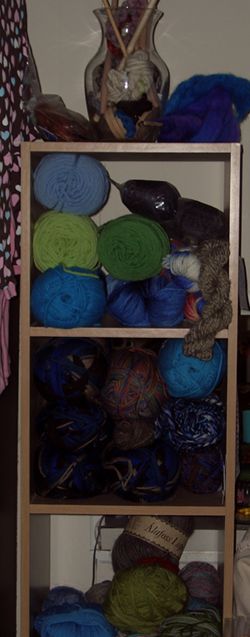
My personal Yarn stash. Which isn't to suggest that it never gets used for business... it does, but if I am gonna knit or crochet, it is from this stash. :)
Yarn Stash

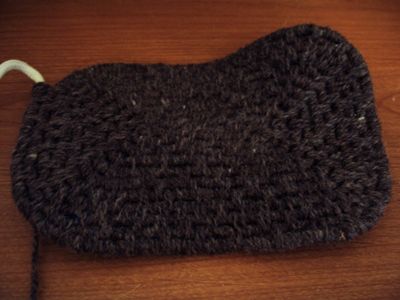
And here is the start of the basket I am making for the shelf. boring base, but after it gets about 2 inches bigger on each side, I am gonna start the sides in some brown/white natural hand spun I did early in my spinning adventure. that should lend some visual interest to the peice.
Basket Base


Hope you like my new space. There are still a few kinks, and a few things to finish, but I like it.

Photobucket

3/16/09

Craft Room Re-do!

Readers who frequent the same message boards as I may already know that I have been working hard on my Craft room. the room is large, but also must function as office/computer room, and as Dining room, and has no real storage, no closets, and no built in shelves.

Well, its been a long time coming, but I have finally re-done it.

Of course, that is completely on a re-arrangement/organization level. no new paint, and so far, no new window dressings. But its a start.

Previously, I had done my craft room in This Post. But that was before we were given DH's Bubby and Zadie's Dining room table, a beautiful old table, which has seen several generations of use. My Father in law remembers causing one of the many story-telling dings in the table when he was 2 years old. We decided that despite its dings, it is still a very pretty table, and more than that, it is an heirloom for my husband, and for our kids.

So, we had to find space.

and of course, we had 2 computers up until recently, a desktop and a laptop. Well, then 2 things happened. we replaced the dying laptop with a humungo but amazingly fast and up to date desktop, and days later, the old desktop pretty much died. so now, we have one functioning computer, which takes up a lot more space than my old laptop did.

Then there are the sewing machines. well, one serger, one embroidery/sewing machine, and one high tech sewing machine. I love them all. but, in the space I had, the poor embroidery machine was sadly ignored. and piled upon, so I could barely get to it. completely sacrilegious.

I had to make some decisions. we got rid of the old desktop, and are sharing one computer now, which we moved onto the computer desk, where my 3 machines had previously been housed.

I decided to relegate the sewing only machine to backup, and it will move upstairs to be stored, and now I will have only 2 machines in front of me, and will still have 3 functions. The machines are moved to the sewing table, where the new computer had been housed. (I know, we were backwards, but the sewing table did not have room for 3 machines. it does have space for 2.)

I gave away to a friend a PILE of fabrics, mostly fleeces that I was not using, and probably never would. when they were bought, I was using them, of course, but my sewing skills, and my diaper construction has changed so much that it was just a waste of space to keep them.

Now, all my fabric is confined to one large dresser (6 feet long) which when we need it, functions as a buffet, as well. Also on that dresser is the tower of shelving I previously had over my sewing space. It now holds my personal yarn stash, not the hugest stash, but it fits well. on top, my vase of spindles and mini-skeins has a home.

No more fabric on the big book shelf we brought into the room last summer. instead, I currently have 6 big show-off bins (which fit perfectly 3 to a shelf) and 1 small one. I need 3 more large ones and 2 more small ones to make best use of the space.

My favorite new feature is my vertical storage. more specifically, I finally convinced DH to mount a shelf on the wall above my new sewing space. on that shelf will be my collection of stabilizers, and embroidery and sewing accessories I don;t want the kids reaching. they'll be stores nocely hidden (mostly) in the basket I am making just for the shelf. I think my spinning basket will also find space up there.

My thread racks have moved to their new home, over the new sewing space, a little higher than I first thought, but possibly better this way, since the machines can be pushed all the way to the wall without bumping thread.

Sorry for the incredibly long picture free post. I promise, the next one will be picture heavy and show off all this craft-room goodness. I just have to finish cleaning up remnants and take some pictures.

This also means you can expect to see installment 2 in the Art of the Rolag very soon. Spinning the Rolag. I just could not see video recording in the mess I lived in before.

Photobucket

8/30/08

Snap Press Conversion Time!

I've been wanting to convert my snap press into a Kick Press for a while now, Every since I saw a picture of it online. Well, Guess what? I'm doing it!

Well, actually, my husband is doing it for me. But I collected all the parts for it.

So here are the specs. I know I was lost looking for specs, and I want this to be easy for anyone to do.

Supplies needed:
--1 tool stand. I used a 29" Universal tool Stand, 29.99 from harbor freight, and 8 dollars shipping. if I had ordered a day earlier, I would have caught it on sale for 19.99.... but oh well.

--Lumber. I used 3/4" A/C Plyboard, one peice cut to the size of the bottom of the stand (it should have been a few inches longer, though, I think) and one peice for the top, a bit bigger than the top of the stand, to give me a good surface. (My stand is a very narrow one though, only 9.5 inches wide on top, so if you have a wider top, you may want yours to be closer to the size of your top.

You also need a peice for the lever. the ones I saw online used 2x4, but we used a length of 2x6. It gives a better foot space.

--Hardware. A hinge, we used a regular door hinge, and bolts to connect the pieces. You will also need some rope and brackets to connect the bottom of the stand to your base wood.

and here's how we built it.

step one: take the whole family to the store, get out of the car, and realize you forgot your list of measurements at home. Go Home and get them.

step two: Back to the store. buy hinges, and plywood. don't forget rope and bolts.

Step three: Make DH start putting the sucker together. Make sure to get a cute pic of Beeba 1 "helping" sand a paint stirrer.

Step four: get the sucker inside, and fight with getting the rope length exactly right. Realize the base wood should actually be a good six inches or so longer, because it is really not easy to press snaps while sitting with a diagonal push. It would be much easier to press them if the weight were straight downward.

Step four. Enjoy having a Kick press that, while not perfect yet, is a whole lot better than it was when it was fully manual.

I'll update when I finish improving it.


7/5/08

The Aftermath...

... Of not so spring Cleaning, that is... heh... When my husband realized he had yesterday off, he decided this weekend would be a "do things around the house" day. Worked out for me... I feel like I got a whole new Sewing room, all over again.

I had been talking about putting a bookshelf in the under-utilized corner. Before, we had a secretary's desk there, but it just didn't have any point in this room. Unfortunately, as pretty as it was, it kept being used only as a small inefficient catch-all.

So he cleaned up the desk, and brought it out into the living room. I finally hung sheers up under our curtains, which makes the room feel much nicer, and worked on re-organizing my storage spaces.

He brought down the bookshelf, and this morning I went to Walmart and got a couple clear boxes with lids, which fit perfectly, 2 per shelf... I'll have to get more later for the rest of the shelves. I also found an Ironing board for $10! I had a small counter top board, but was always frustrated with it, because it was always too small.

but I found I also got shelves for behind my sewing machine.th I couldn't find the wire cubes I was thinking of...these little shelves that fit there, and they were actually half the price! I am satisfied... and I discovered that by moving my desk lamp up to the top of the shelves, I get lots more light, and don't need to have the overhead on nearly as often.

I cleared the top of my storage dresser, and found homes for everything that was there. That was a lot of work... I didn't realize how much stuff there was!

The desktop computer area is still a mess, but that is more of my husband's space, rather than mine... so I'll let him handle it. Now if only I didn't have to go over there and use the printer and my thumb drive every time I want to upload pictures!

So that's what we did yesterday. Today, I put up the shelves behind my sewing machine, and am working on an order. Its almost done, needs snaps, a last piece of elastic, and the backs serged up for each diaper... that won't take too long.

Meantime, don't forget, Until tomorrow, you can still save 10% off your orders with the code 4th at checkout!

7/3/08

To Rearrange, or not to Rearrange?

Heh. I just finished showing off my workspace,although I suppose really that was more about my machines, and I am already thinking about how I can re-arrange it. more specifically, make it more efficient. As it is, On the side of the room I didn't show, I have piles of fabric, and I can't even Iron because the Iron is all covered up. I have dead space behind my machines on my desk, and an underutilized cornier of the room.

So, my thoughts: Get one or two systems like this one. Stack them only 2 or 3 High. (I think thought that if you stack 2 high, you can only get one full cube from the other pieces in the set, so I am thinking 2 sets stacked 3 high.

One stack would be put in the back corner of my sewing desk, behind my sewing machine. It would hold, on the bottom cube: Stabilizers and Embroidery disks. maybe a binder if I print out my embroidery designs into a paper catalog... but not sure on that one.

Above that in the second cube would be Embroidery Blanks. Things that don't need to be cut. (things that need to be cut are better off being closer to the cutting area.)

The Third Cube would hold either more embroidery Blanks (which eventually I am sure I will accumulate) or I don't know what. On top of the third cube, I'd like to get a clock of some kind... something cute and fun.

Across the room, I would like to put a second stack. That would be on the table that houses our desktop computer. In that one, I would re-organize our computer paper, software, and etc. My Husband has a lot of games that take up space, it would be a good place for it.

Then, I'd like to bring down a bookshelf... we have one like this one only brown up in our spare room... unused. The only problem is, its pretty tall, and our toddler runs around in this room... we'd need to anchor it to the wall... and my husband does not want to do that.

but, if it got brought down, it would find its home in the under utilized corner. I would like to use the top shelf for accounts (paper copies of sales and etc), patterns, etc. Depending how much space was there, I would like to keep a basket of some kind for extra notions and things.

The rest of the shelves I would like to fill with plastic bins. The kind with locking lids. Each bin would have specific things.... finished products that are stocked on etsy, on beebabottoms.com, things that aren't stocked, items that are part of in-progress orders, etc. Then I can dedicate the drawers those things are in now to what they were originally meant for... more fabric!

I keep re-organizing this room... trouble is, with Beeba 1 running and playing in here, it gets a mess again in no time. I have to keep his little table here too... for him to color at, or do crafts of his own. And the swing for Beeba 2 stays too. And the toys Beeba 1 drags in... hmmmm... will my space every really be organized and efficient? for more than a day?


blogger templates | Make Money Online